Chalking the iChalk Way
Now that you and your friend Jane started a chalk session, you and Jane will end up spending some time having all kinds of fun, even forgetting about your original plan for the evening.
Click on the main window. If the big button at the bottom was green, you will notice it now turns blue. On the other side, it should have turned red, barring your friend from taking control.
Clicking on one of the three buttons (hand, the eraser and the chalk) at its left corner repeatedly, he finds that each button cycles through different options. They are followed by the color well and two more buttons: one for QuickTime movie making and the other for controlling pressure sensitivity of stylus.
Changing window sizes : [for v3.0 or later]
With iChalk 3.0 or later, Jane finds that she can change the size of its Window. She finds that the joining party will automatically adjust its window size to match what is initially set up. The person in control of the document may even change the window size on the fly. All joined parties will see their document size adjusted accordingly!
The previously saved window size can be recovered by choosing the Restore Saved Window Size item in the Window Menu.
There are two limitations for changing window size that you may keep in mind:
If your document is being shared, the window size may be changed only when you have the control. (The button on the bottom of the window should lit blue.) If you were in the middle of adding a text block (caption) to the board, you first have to close the text input field before being able to change the window size.
Window size variation works only when every body is using the version of iChalk 3.0 or later. Changing both the size and the board color with pressure sensitivity on may yield an inferior image quality.

Explore what you can do with the tools
Chalks
 Some of you may find the range of drawing tools offered in iChalk extremely limited.
Given that there are amazing paint and drawing programs for serious professionals,
we chose to offer an alternative approach.
Let us pretend, at least while using iChalk, that quality of your final work is limited by your creativity
rather than by the range of tools. We are not claiming that this is always the case.
But when we watch a good artist go about his or her usual work, we are struck by the masterful,
and easy-going strokes rather than by the variety of tools and pigments on their table.
Of course you will not expect to create a Vermeer painting or a Miyazaki anime using iChalk.
But how about an initial germ of such masterwork?
Do you have your own studio with all those tools conducive to the flow of your genius in your house?
What about the possibility of some spark coming off the rough sketch you and your buddy create?
We would like iChalk to be a tool available for such needs.
Current version of iChalk offers three types of color chalks by default.
With iStorm/iChalk v3.0 or later, pressing option key while using either the chalk or the eraser will double its size. Control-key will quadruple the size.
We do not expect that everybody will agree with this Spartan way of thinking,
and iChalk in the future may become more versatile.
In the mean time, we would like users to experiment with the boundary of their creativity under self-imposed constraints. Think Dogme cinema. Venus of Milo. Paper cuts of late Matisse. A New Yorker cartoon. All right. We are stretching too far.
In this spirit anyway, Jan created this:
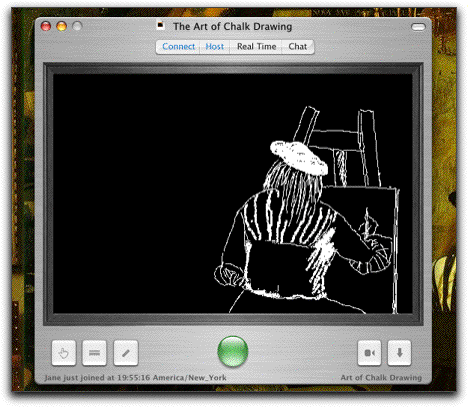
Mmmmmm. Given Jan's initial ambition regarding Jane, we think he could have done a little better. But it is for a start, so let us hope for the better later on.
First, he finds that the chalk tool cycles through three different sizes as he keeps clicking on the button. Double-cliking on the main drawing board also cycles through the currently selected tool. However, if you use a stylus, you may find the board responding to double-clicks tend to interfere with your rapid strokes. In that case, you may switch off the response behavior by clicking the appropriate button in the tool chest.
 [The tool chest is accessed by clicking on the empty area (marked yellow above) to the left and right of main button at the bottom of the window. It can be done also from the menu.]
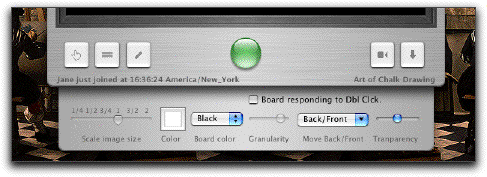 Selecting a chalk, Jan notices that the granularity slider becomes available which controls the texture of the chalk. In the tool chest, he also finds a color well to choose different colors for the chalk.
When you choose a different tool, the chalk tool switches back to its default (medium size) or maintain your choice depending on how you set it in the Preferences.
Attention: Wacom tablet users
With iStorm/iChalk version 3.0 or later, the eraser on top of wacom stylus is automatically recognized. Just flip the stylus while using the chalk tool, and it will automatically function as an eraser with its size determined by the current chalk size.
Caption/Text tool
[v 3.3 and later only]
The last item  in the chalk tool is the caption/text block tool with which you can type in rich text line by line. (You can change the style, color, baseline (super- or sub-scripts) etc in the middle of composing a line, or apply to the whole selection in the line during its composition.) Since it is primarily meant to be adding something like speech bubbles in a comic book panel, it has a limited editing capabilities. Just click on the board and start typing a simple line. When you are done for the line, press return key for the next line.
If your line needs to be extended horizontally, just click on the board where you want the left-bottom corner of the block of text to be.
When you are done with a few lines of text, how do you terminate the process? Press Tab or Esc key. Or simply press the return key twice in a row (as if you want to enter an empty line). The board will take it as your signal to terminate the process. That way, you are saved one more trip to the mouse.
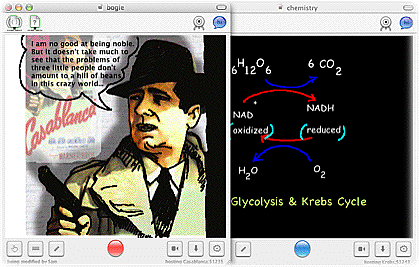
The figure above shows the kinds of things you can do with the new caption tool.
When you input a line of caption, remember that you can change its various attributes such as font, size, color and
base line. [for super- or subscripting, use Command-}, Command-{ and Command-| as you would in the main iStorm document.]
Once you have created a caption block like this, then you can use the caption-hand tool (part of the Hand tools below) to reposition or delete it later.
Currently, this tool does not offer a way to revise an existring caption, though.
Erasers
 And we have Jane to save Jan. In the following figure, we see that Jane is indeed trying to help Jan by taking control (red button on Jan's side, blue on Jane's) and adding a figure. It is not exactly helping Jan, but she seems to have a distinct style of her own.... She even dared erasing some of Jan's drawing, without his permission!
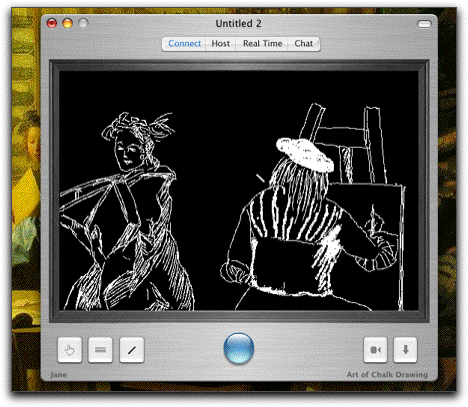
The eraser button cycles through three different types. The first one with the rugged bottom has a slightly annoying feature of leaving some dust. This is partly developer's whim, and partly to provide some sense of history of activity on the board as it gathers dust and leaves trace around. The more you use it, the more dust it will gather, up to a point. The second one with flat bottom will correspond to super-clean eraser with slightly bigger size. (The dust on the first one is reset to minimum once you choose the super eraser.) The third one, which looks like the eraser tip of a pencil provides finer eraser control.
The last one  is for erasing a text box. It does not allow erasing individual characters but the whole block of text (caption) whose rectangle center lies closest to the mouse point. If one wants to delete several captions at the same time, one may use the caption hand tool to select the captions (by Shift- or Command-clicking them) and pressing the delete key.
With iStorm/iChalk v3.0 or later, pressing option key while using either the chalk or the eraser will double its size. Control-key will quadruple the size. This is useful especially for iChalk v3.0 or later when the window size has been enlarged and the normal tool size is no longer adequate in size.
Puffers
 Choosing puffer and clicking on the board erases all previous drawing of Jan. A feature Jane is resisting hard to use now.
It cycles through three options. First, it will erase only the front layer (the one Jan drew with chalks). The second setting will erase only the background imported image, if any.
The last will erase both. This action has limited undo support.
Pressure Sensitivity
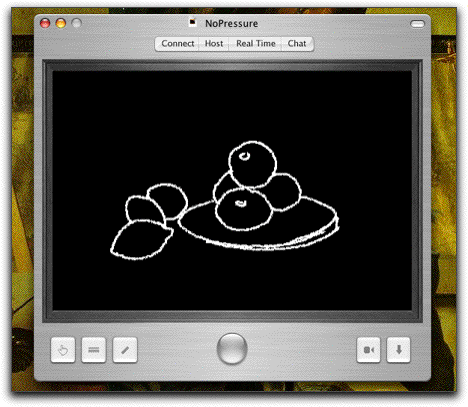
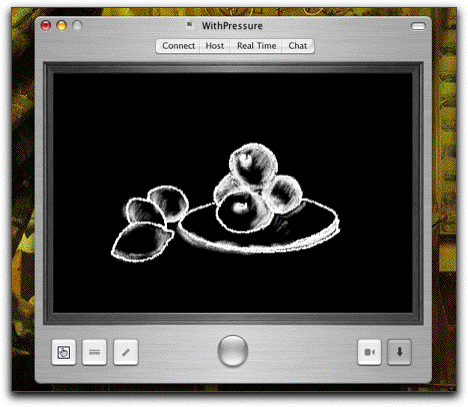
 Jan has a pressure sensitive stylus (such as Wacom), so he can take advantage of it by toggling the button for pressure sensitivity. Both the chalks and erasers become pressure sensitive when the button is lit blue. Even without pressure sensitivity, he finds that the use of tablet and stylus immensely enhances the experience with iChalk.
This is how Cezanne would start his still life with a stylus without pressure sensitivity.
With the pressure sensitivity on, one could be much more expressive. We are aware that most art teachers will still cringe at the drawing below.
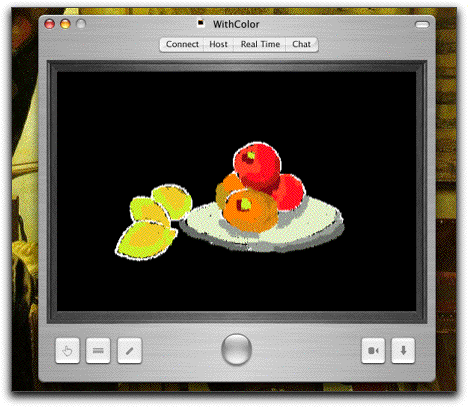
Of course, having full color helps mask your deficiency in sketching.
Undoing a stroke
iChalk has somewhat limited undo capability. Only the immediately preceding stroke will be undoable. This limitation is due to some compromise we had to make in optimizing the network communication of changes made.
Hand tool
 The hand tool is for moving the picture into programs which accept dragged-in Tiff images, such as Apple's rich text editor, or Microsoft Word. When moved onto Finder, it will be in the format of in the format of the ubiquitous tiff file, which may be imported into Photoshop or similar programs for a very serious touch-up. (We find jpeg is the most convenient format for general use. iChalk can save the board content as a JPEG file as well as its native format.)
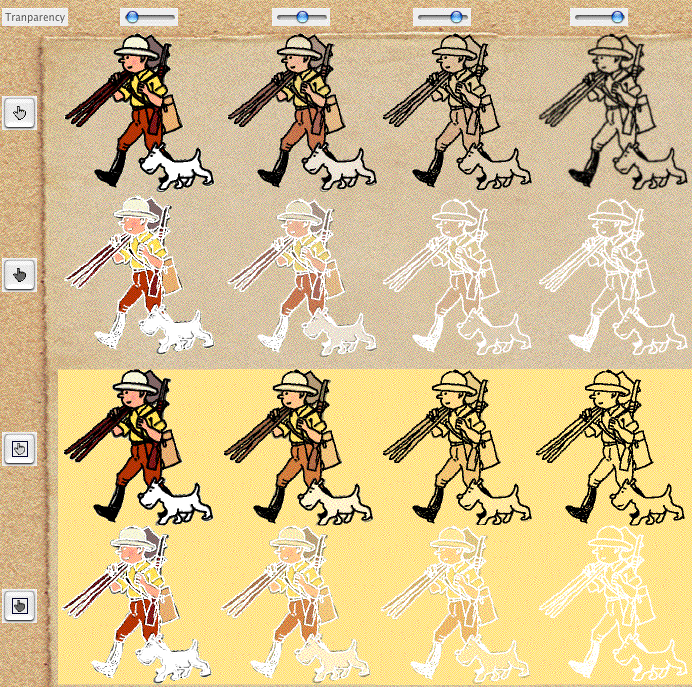
The first two hand tools will give you either original drawing  or an inverted color version of the front layer
  (only those touched by a chalk or an eraser) and the imported background image, if any.
The relative transparency of the background image will be set by the current transparency setting on the slider.
If you want just the chalk drawing with transparent background, adjust the transparency slider to make imported image invisible before using the hand tool.
The last two hand tools are to move the images (chalk drawing
  and the imported image
  , with adjusted transparency)
and the underlying board color. This is useful when you want the images lying on top of a solid rectangle with the board color.
When a background image is imported, it is automatically resized to fit inside the current board, while preserving its aspect ratio. Sometimes, one may want to trace only a part of the image with its size enlarged.
With v3.0 or later, you can rescale and move background image to do that: With any of these hand tool chosen, press option key while dragging the mouse to make a rectangular lasso around the area of the imported image to be enlarged. Upon releasing the mouse button, the image will be resized and moved in proper location to let you focus on the area of your selection.
This is undoable with limitation. Once you zoom-in on the background image, you can not zoom out to an arbitrary size and location. The only way to do so is to drag in the original background image again.
Attention: Users of iChalk version 2.63 or earlier
Please note that the behavior of the hand tools described above is subtly different from what you had in earlier versions of iChalk.
Confused with too many hand tool options? Let us assume that you
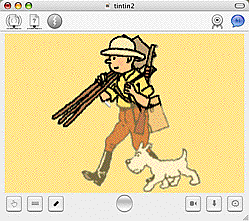
imported a gif image of Tintin and Snowy with transparent background and
traced over it using a black chalk, while having the chalkboard color in
yellow. [The following description applies to iChalk 3.0 or later.
Earlier versions may yield different results.]
Start with an empty board with its background color chosen yellow.
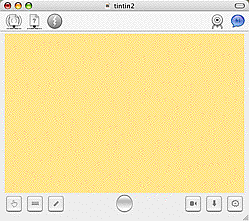
Import a gif image with transparent background.(With alpha channel).
Note that many images do not have alpha channel. In that case, the
background image will fill the whole rectangular area, obscuring the
yellow board background.
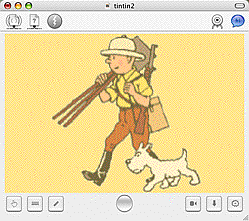
Choose a chalk tool with black color and begin tracing. Note that one
can adjust the strength of the background image by Transparency control
slider in the Toolchest.
Here is the grand summary for what is moved into a Keynote slide with
different combinations of transparency and hand tool selections after
you finish tracing.
Another way to move images back and forth is to use the Misc. selection bar in the tool chest which gives four different ways to move or copy the images from back to front or vice versa within iChalk.
Normally, iChalk shares only what is on the front over network. The background is hidden from other members. The move- or copy- to Front operation provides a way to share an image. Of course, one can drag the image into the main document window. The move to back operation is handy for rotoscoping (more on this later) and the same functionality is accessible also from a button which appears (named "to Back") next to the Quicktime movie button.
One can exchange commentary on an imported image by first making it to the front (to have it visible to others). Add your own commentary, and send it over for others to add their own.
The last hand tool  is for selecting and moving caption (text block) around in the blackboard.
Scaling image sizes to move
When you use one of the hand tools to move image outside iChalk, you can use the image size scaling slider control in the tool chest to make it smaller or bigger.
The video frame grabber:[for v2.5 and later]

 If you have a web cam or a digital video camera, connect it and switch on before starting iChalk. Choose "Show Video Grabber" in the Tools menu or click on the frame grab button in the toolbar. A small window named "Grab Video" will open and show the video in real time as long as the window is active. Click and drag the image either into the iChalk document, iChalk window or Finder. You may use this to write a lab report for your chemistry class using the video footage you made in the laboratory. How about a quick inventory of junks on your desk?
Explore aspects of collaboration
iCourtesy: If you take control and do nothing for too long:
You thought you had such a cool idea and seized the control but immediately hit the painter's block, if there is such a thing. At the same time, you just remember the Grater's ice cream in the fridge, and then caught the sight of Princess Mononoke on TV on your way back to iChalk. Having realized that you don't have to worry about your pigments going dry with iChalk, you settle in front of the TV for a while.
If you dare do this while Jane is waiting for her turn to finish that right foot of the figure, iChalk will have to do something to save your relationship. After a few minutes (which you can change from the Preferences) of such indulgence, iChalk will automatically yield your control so that Jane can finish her masterstroke.
Real time update:

 If you and Jane have fast and robust connection, you can send your update every few seconds (the interval can be changed from the Preferences) to the other person while drawing on the board. You turn this on and off either from the Realtime button in the toolbar or in the Connections menu.
We strongly discourage you from using this feature if you have a slow connection (especially across internet) or if you constantly move large images back and forth. It often bogs down the performance due to network contingencies. You will notice that the response of the chalk may not be as natural. Use it only to impress your Windows friend or uncle who is still championing OS 9.
Be inspired!
In our sparsely populated Tools menu, you will find two unusual items:

The one called "Submit to New Yorker" is our quirky way of paying tribute to the venerable institute which is universally identified with the inspired cartoons. We hope that some of you will knock this very difficult-to-pass but worthwhile door with your inspired creation someday. Let us quote what Mr. Mankoff, New Yorker's current editor of cartoon department said in an interview:
Cartooning is creativity stripped down to its core, because it's removed from the real-world constraints (and consequences) that complicate other applications of the creative mind. It's a form of play which depends on spontaneity and, by extension, creativity. Bob Mankoff
Another item called "Be inspired" will take you to a random choice from our carefully selected web sites which feature timeless awe-inspiring arts as well as art works from children all around the world. The available sites will be periodically updated and iChalk will automatically fetch the updated list.
If you have problems or questions:
I connected the camcoder, but the frame grabber still complains that there is no video source.
You may have switched on the video camera after iChalk launched. Please quit iChalk, make sure the camera is turned on in a appropriate mode, and re-launch iChalk.
I connected my digital camera and the video grabber doesn't work. Please don't tell me that digital camera is not a video source!
Unfortunately, digital cameras do not interact with your computer as the camcoders do, and iChalk is not yet capable with utilize digital camera input. We heard rumors that one may force some special brands of digital camera to work like a web-cam, but we could not verify it.
Any luck with analog video camera?
If you have a third party video card installed on your machine and if the Mac receives video signal from an analog video source, it may possibly work without glitch. However, we could not test this possibility ourselves. Please let us know your story, if you had success with it.
Naturally, I wonder why real-time movie capture is not offered?
Given the array of Quicktime functions utilized by iChalk, it is indeed natural to expect so. However, real time video grabbing is a very intensive process and
likely to conflict with the idea of seamless collaboration. If you doubt this, try video capture in iMovie and feel how it affects other processes. Furthermore, while recognizing that it could be essential for some type of collaboration, we believe that exchanging a few frames may often be more productive.
I dragged in a huge image. I need to trace only a small part of it. How do I enlarge only part of the image?
With iChalk v3.0 or later, you can easily do the followng:
First, drag in the image.
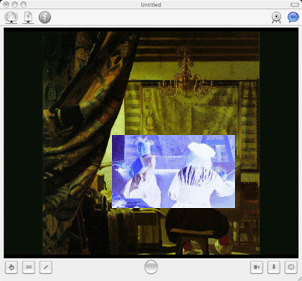
Second, choose the hand tool if it is not selected already. Then with the option key and the mouse button pressed, drag the mouse to select the region to be blown up. Releasing the mouse button, the background image will be replaced with a new one with the selected area.
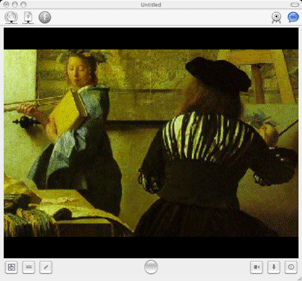
I have only a small sketch in the document, yet the saved document size is several megabytes? How come?
Most likely, you have dragged in a large background image into the chalkboard to trace, and set it to be transparent. Having made it invisible, you see only the part of your drawing. When you save the document, however, iStorm/iChalk saves the imported image along with your own work. If you find it unnecessary, resave it after removing the background image using one of the Puffer tool.


 Some of you may find the range of drawing tools offered in iChalk extremely limited.
Given that there are amazing paint and drawing programs for serious professionals,
we chose to offer an alternative approach.
Let us pretend, at least while using iChalk, that quality of your final work is limited by your creativity
rather than by the range of tools. We are not claiming that this is always the case.
But when we watch a good artist go about his or her usual work, we are struck by the masterful,
and easy-going strokes rather than by the variety of tools and pigments on their table.
Of course you will not expect to create a Vermeer painting or a Miyazaki anime using iChalk.
But how about an initial germ of such masterwork?
Do you have your own studio with all those tools conducive to the flow of your genius in your house?
What about the possibility of some spark coming off the rough sketch you and your buddy create?
We would like iChalk to be a tool available for such needs.
Current version of iChalk offers three types of color chalks by default.
With iStorm/iChalk v3.0 or later, pressing option key while using either the chalk or the eraser will double its size. Control-key will quadruple the size.


 in the chalk tool is the caption/text block tool with which you can type in rich text line by line. (You can change the style, color, baseline (super- or sub-scripts) etc in the middle of composing a line, or apply to the whole selection in the line during its composition.) Since it is primarily meant to be adding something like speech bubbles in a comic book panel, it has a limited editing capabilities. Just click on the board and start typing a simple line. When you are done for the line, press return key for the next line.
If your line needs to be extended horizontally, just click on the board where you want the left-bottom corner of the block of text to be.
When you are done with a few lines of text, how do you terminate the process? Press Tab or Esc key. Or simply press the return key twice in a row (as if you want to enter an empty line). The board will take it as your signal to terminate the process. That way, you are saved one more trip to the mouse.

 And we have Jane to save Jan. In the following figure, we see that Jane is indeed trying to help Jan by taking control (red button on Jan's side, blue on Jane's) and adding a figure. It is not exactly helping Jan, but she seems to have a distinct style of her own.... She even dared erasing some of Jan's drawing, without his permission!

 is for erasing a text box. It does not allow erasing individual characters but the whole block of text (caption) whose rectangle center lies closest to the mouse point. If one wants to delete several captions at the same time, one may use the caption hand tool to select the captions (by Shift- or Command-clicking them) and pressing the delete key.
 Choosing puffer and clicking on the board erases all previous drawing of Jan. A feature Jane is resisting hard to use now.
It cycles through three options. First, it will erase only the front layer (the one Jan drew with chalks). The second setting will erase only the background imported image, if any.
The last will erase both. This action has limited undo support.
 Jan has a pressure sensitive stylus (such as Wacom), so he can take advantage of it by toggling the button for pressure sensitivity. Both the chalks and erasers become pressure sensitive when the button is lit blue. Even without pressure sensitivity, he finds that the use of tablet and stylus immensely enhances the experience with iChalk.


 The hand tool is for moving the picture into programs which accept dragged-in Tiff images, such as Apple's rich text editor, or Microsoft Word. When moved onto Finder, it will be in the format of in the format of the ubiquitous tiff file, which may be imported into Photoshop or similar programs for a very serious touch-up. (We find jpeg is the most convenient format for general use. iChalk can save the board content as a JPEG file as well as its native format.)
 or an inverted color version of the front layer
  (only those touched by a chalk or an eraser) and the imported background image, if any.
The relative transparency of the background image will be set by the current transparency setting on the slider.
If you want just the chalk drawing with transparent background, adjust the transparency slider to make imported image invisible before using the hand tool.
The last two hand tools are to move the images (chalk drawing
  and the imported image
  , with adjusted transparency)
and the underlying board color. This is useful when you want the images lying on top of a solid rectangle with the board color.


 is for selecting and moving caption (text block) around in the blackboard.

 If you and Jane have fast and robust connection, you can send your update every few seconds (the interval can be changed from the Preferences) to the other person while drawing on the board. You turn this on and off either from the Realtime button in the toolbar or in the Connections menu.
We strongly discourage you from using this feature if you have a slow connection (especially across internet) or if you constantly move large images back and forth. It often bogs down the performance due to network contingencies. You will notice that the response of the chalk may not be as natural. Use it only to impress your Windows friend or uncle who is still championing OS 9.


